Presentations
Stucco: Start to Publish
Creating an open source module in minutes!
Follow Along or
Jump Ahead
You can see the slides: Slides Or look at the full thing: Doc
Quick Intro
- Gilbert Sanchez
- Señor Systems Engineer at Meta
- Writing PowerShell for the last 10ish years
Agenda
- Install Modules
- Setup Our Github Repo
- Create Our Module
- Commit
- Publish
Pre-Requisites
If you want to follow along on your computer here’s what you should get ready.
- Github account
- Git installed
- VS Code (Recommended)
Install Stucco!
A good starting point.
Install-Module Stucco
Configure Your Github Repository
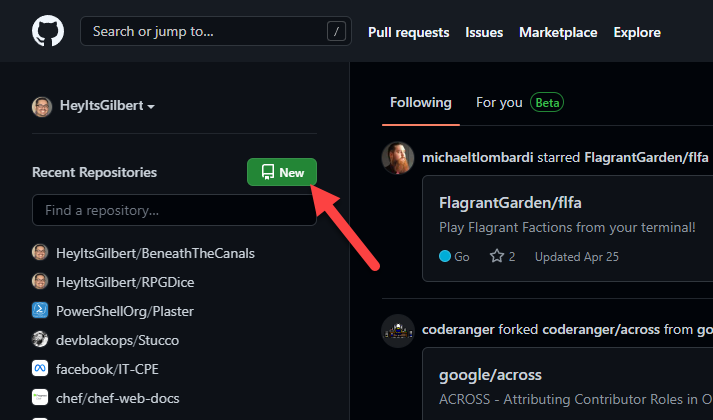
Create Repo & Check it Out
- Pick a name, description, etc.
- Create Repository
- Check it out!
Create Your Module
New-StuccoModule
Follow the prompts
Let’s Examine
- Repo Layout
Requirements.ps1psakeFile.ps1Build.ps1
Build
.\build.ps1 -Task Test
Or in VS Code
Terminal -> Run Task -> Test
Commit your code!
git add .
git commit -m "Initial commit!"
git push
Get Ready for PSGallery
- Login to PSGallery
- Create API keys
- Copy
Put Your API Key into Github
- Go to your new repo
- Settings
- Secrets -> Actions
- “PS_GALLERY_KEY” and paste
Time to Publish
At this point your code should be ready to publish.
Bonus: Test Results on PR’s
$PSBPreference.Test.OutputFormat = 'JUnitXml'- Upload your unit tests via
upload-artifact - Use
EnricoMi/publish-unit-test-result-action@v1
See CI.yaml
Thank you!
Cover Photo by Avel Chuklanov on Unsplash